📅
June 2026 | ✍️ Mitti Gold Organic | 🗂️
Soil Health
Introduction to Granulated Vermicompost and Manure
The agricultural industry is witnessing a massive shift towards sustainable and organic farming practices, moving away from harsh chemical fertilizers that deplete soil quality over time. Central to this organic revolution is the utilization of
vermicompost and
cow dung manure, both of which are phenomenal sources of essential macro and micronutrients. However, applying these natural fertilizers in their raw, powdery, or clumpy forms presents significant logistical challenges. The dust can blow away in the wind, they are difficult to distribute evenly across large fields using modern machinery, and their nutrient release rate can be unpredictable. This is where the process of granulation comes into play. By converting high-quality vermicompost and composted cow dung into uniform, dense granules, farmers can dramatically improve the handling, storage, and application of organic fertilizers. Granules offer a slow, steady release of nutrients directly to the plant roots, minimizing leaching and runoff, and maximizing the return on investment for the farmer. This guide will walk you through the precise steps required to manufacture these granules efficiently.
The Importance of Granulation in Modern Organic Farming
Granulation is not merely a cosmetic enhancement; it is a fundamental upgrade to the efficacy of organic fertilizers. When you apply raw cow dung or standard
vermicompost to a field, a substantial portion of the volatile nitrogen can be lost to the atmosphere, and soluble nutrients can be washed away by heavy rainfall before the plants have a chance to absorb them. Granulation solves this problem by encapsulating the organic matter, beneficial microbes, and nutrients within a compressed, spherical form. This physical structure inherently resists rapid degradation, ensuring a slow and sustained release of fertility over the entire growing season. Furthermore, granules are heavy enough to sink into the soil profile rather than blowing away, and their uniform shape allows them to be used seamlessly in mechanical seed drills and fertilizer spreaders, saving massive amounts of labor. For large-scale organic operations, the ability to apply organic amendments with the same precision and ease as synthetic urea or DAP is a game-changer that significantly boosts overall farm profitability.
Understanding the Science Behind Vermicompost Granules
To truly appreciate the value of
vermicompost granules, one must understand the biological and chemical science that makes them so effective. Vermicompost is essentially the excrement (castings] of earthworms that have consumed decomposing organic material. These castings are incredibly rich in plant-available nutrients like nitrates, phosphorus, magnesium, potassium, and calcium. More importantly, they are teeming with beneficial soil microorganisms, enzymes, and plant growth hormones such as auxins and gibberellins. The scientific challenge of granulation is to compress this biologically active material into a solid sphere without generating excessive heat or pressure that would kill the beneficial microbes or denature the enzymes. When formulated correctly with the right moisture content and natural binders, the resulting granule acts as a microscopic ecosystem. Once placed in the soil and exposed to moisture, the granule slowly swells and breaks down, releasing a steady stream of bio-available nutrients and inoculating the surrounding rhizosphere with a robust community of microbes that actively protect the plant from pathogens and improve soil structure.
Nutritional Profile: Why Granules Outperform Raw Manure
Comparing the nutritional profile and delivery mechanism of granulated manure to raw cow dung clearly illustrates why granules are superior. Raw cow dung, while beneficial, is highly variable in its nutrient content, often contains weed seeds and potential pathogens, and has a very high moisture content that makes transportation expensive and inefficient. Furthermore, the rapid decomposition of raw manure in the field can sometimes lead to a sudden spike in available nitrogen, which can burn delicate roots, followed by a rapid depletion of nutrients. Granulated
vermicompost and cow dung, on the other hand, represent a concentrated, stabilized form of nutrition. The composting and granulation processes eliminate weed seeds and harmful pathogens while concentrating the carbon, nitrogen, phosphorus, and potassium. Because the nutrients are bound within the granular structure, they are released progressively in sync with the plant's growth cycle. This means the plant receives exactly what it needs, when it needs it, leading to stronger root development, better drought resistance, and ultimately, higher crop yields.
Raw Material Selection: Choosing the Best Cow Dung and Biomass
The foundation of a high-quality granule lies entirely in the quality of the raw materials used. You cannot make a premium fertilizer from inferior inputs. When selecting cow dung, it is crucial to source it from healthy cattle that are fed a diverse, natural diet, as this directly impacts the nutrient density and microbial richness of the dung. The dung should ideally be aged for a few weeks to allow the initial intense heat of decomposition to pass and to reduce the ammonia levels, which can be toxic to earthworms if you are making
vermicompost. In addition to cow dung, incorporating a variety of agricultural biomass can greatly improve the final product. Dry leaves, crop residues, straw, and even mild organic kitchen waste provide essential carbon, which balances the high nitrogen content of the dung. This carbon-to-nitrogen (C:N] ratio is critical for the composting process. A well-balanced mix ensures rapid breakdown by microbes and earthworms, resulting in a dark, rich, and earthy-smelling compost that is ideal for feeding into the granulation machinery.
The Initial Composting Phase: Preparing the Substrate
Before any material can be granulated, or even fed to earthworms, it must undergo a thorough initial aerobic composting phase. This step is non-negotiable. Fresh cow dung is too hot, too acidic, and too high in ammonia for immediate use. The composting process involves piling the mixture of cow dung and carbon-rich biomass into long windrows or large heaps. These piles must be turned regularly using specialized compost turners or front-end loaders to introduce oxygen, which fuels the aerobic bacteria responsible for breaking down the organic matter. During this phase, the temperature inside the pile will rise significantly, often exceeding 60°C (140°F]. This thermophilic phase is vital because it effectively pasteurizes the compost, killing off harmful weed seeds, human pathogens like E. coli and Salmonella, and plant disease vectors. The pile must be kept moist but not waterlogged. After several weeks of turning and managing moisture, the temperature will drop, and the material will transform into a stable, dark, crumbly pre-compost, ready for the next stage of production.
Earthworm Selection and Introduction for High-Quality Castings
If you are producing
vermicompost granules rather than just cow dung granules, the next critical step is the introduction of earthworms to the stabilized pre-compost. Not just any earthworm will do; you need epigeic species, which are surface-dwelling worms that consume organic matter rapidly rather than burrowing deep into the soil. The most commonly used and highly effective species for commercial vermicomposting are Eisenia fetida (Red Wigglers] and Eudrilus eugeniae (African Nightcrawlers]. Once the pre-compost has cooled to ambient temperature, it is spread into shallow beds. The worms are introduced and immediately begin consuming the organic matter, passing it through their digestive tracts where it is ground up and mixed with a highly active community of gut bacteria. The resulting castings are a biochemical masterpiece, enriched with water-soluble plant nutrients and humic acids. Managing the worm beds requires diligent attention to moisture levels (ideally between 60% and 70%], temperature, and pH. Over the course of 45 to 60 days, the worms will consume almost the entire bed, converting the raw compost into premium vermicompost.
Harvesting the Finished Vermicompost: Timing and Techniques
Knowing when and how to harvest the
vermicompost is crucial to maintaining the efficiency of your operation and the quality of your final granules. The compost is ready when it resembles dark, rich coffee grounds and has an earthy smell, with very little of the original organic matter recognizable. At this point, the earthworms need to be separated from the castings so they can be introduced to a fresh batch of food. Harvesting is typically done by utilizing the worms' natural aversion to light and drying conditions. The top layer of the bed is exposed to sunlight or bright artificial light, causing the worms to burrow deeper into the pile. The top layer of worm-free castings is then carefully scraped off. This process is repeated until mostly worms remain at the bottom. Alternatively, commercial operations use large mechanical rotary trommel screens to gently sift the fine castings through a mesh while the larger worms and unprocessed material fall out the end to be reused. The harvested, pure castings are now ready to be prepared for the granulation process.
Drying and Moisture Control: The Critical Pre-Granulation Step
Freshly harvested
vermicompost or composted cow dung typically has a moisture content of around 40% to 50%, which is far too wet for the granulation machinery. If the material is too wet, it will stick to the internal components of the granulator, causing blockages and forming massive, irregular lumps rather than uniform pellets. Conversely, if it is too dry, it will turn into dust and fail to bind together. Therefore, strict moisture control is arguably the most critical variable in the entire manufacturing process. The raw material must be carefully dried down to an optimal moisture level, usually between 15% and 25%, depending on the specific type of granulation machine being used. Drying can be achieved through passive sun drying on large concrete pads, though this is weather-dependent and labor-intensive. For consistent commercial production, mechanized rotary drum dryers or fluid bed dryers are employed. These machines use controlled, low-heat airflow to gently remove moisture without destroying the delicate microbial life that makes the compost so valuable.
Introduction to Granulation Machinery: Disc, Drum, and Extrusion
Selecting the right granulation machinery is the largest capital investment in setting up a production facility, and the choice will dictate the shape, density, and production volume of your granules. There are three primary types of granulators used for organic fertilizers. The Disc Pan Granulator is highly popular; it features a large, tilted rotating pan where the powdered compost is fed. As the pan spins, water or a liquid binder is sprayed, causing the powder to agglomerate into highly uniform, perfectly spherical granules. The Rotary Drum Granulator operates on a similar principle but uses a large spinning cylinder, making it suitable for very high-volume production. Finally, the Flat Die Extrusion Granulator (often called a pelletizer] forces the semi-moist compost through a metal die with rollers, producing dense, cylindrical pellets. While extrusion pellets are very durable, spherical granules produced by pan or drum granulators are often preferred by farmers as they flow much better through standard agricultural broadcasting equipment and seed drills. Your choice depends entirely on your target market and budget.
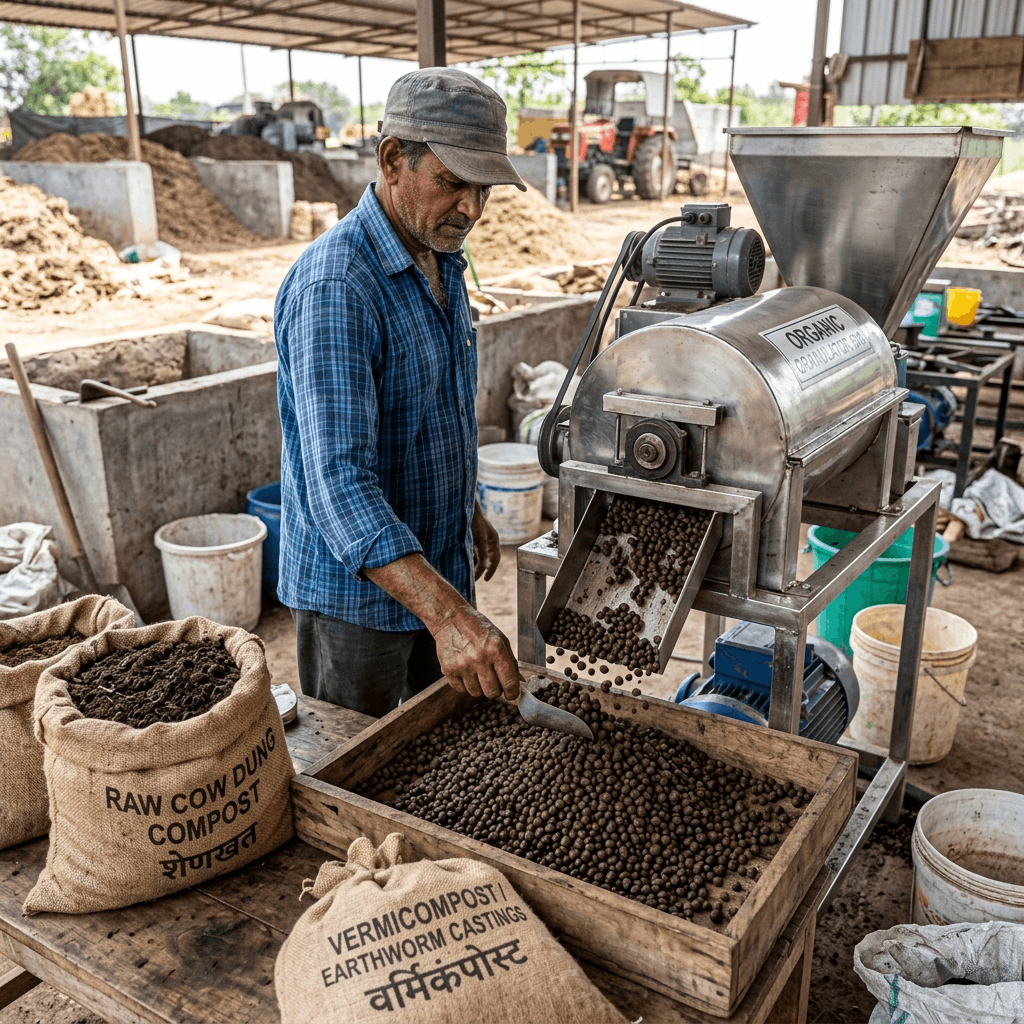
The Granulation Process Step-by-Step: From Powder to Round Granules
Once the material is dried to the correct moisture content and the machinery is selected, the actual granulation process begins. First, the dried compost is passed through a fine crusher to ensure there are no large clumps, resulting in a consistent, fine powder. This powder is then fed continuously into the granulator. If using a disc pan granulator, the operator carefully adjusts the angle of the pan, the speed of rotation, and the rate of the liquid binder spray. As the powder tumbles in the pan, it acts like a snowball rolling down a hill; fine particles adhere to moistened nuclei, growing larger layer by layer. The centrifugal force and gravity cause the larger, finished granules to roll over the edge of the pan while the smaller ones remain inside to continue growing. This continuous process requires a skilled operator to monitor the visual appearance of the granules and make micro-adjustments to the water spray and feed rate to maintain a uniform size distribution, typically aiming for a diameter of 2mm to 4mm.
Binders and Additives: Enhancing Granule Stability and Nutrient Value
While high-quality
vermicompost contains some natural humic substances that act as mild glues, organic fertilizers often require the addition of a binder to ensure the final granules are hard enough to withstand packaging, transport, and mechanical spreading without shattering into dust. Common natural binders include bentonite clay, molasses, starch, or lignosulfonates derived from wood pulp. These are sprayed into the granulator along with water. Beyond structural binders, the granulation stage presents an excellent opportunity to fortify the fertilizer with specific additives. Depending on local soil deficiencies, manufacturers can blend in rock phosphate, gypsum (calcium sulfate], neem cake powder (for pest resistance], or specific bio-inoculants like Azotobacter (nitrogen-fixing bacteria] or Trichoderma (fungus that prevents root rot]. By incorporating these additives directly into the powder matrix before granulation, every single granule becomes a complete, balanced, and highly customized nutrient delivery system tailored to specific crop requirements.
Drying the Granules: Methods for Achieving Optimal Shelf Life
Immediately after exiting the granulator, the freshly formed granules are soft and have a moisture content of around 20% to 30% due to the liquid binder used. If packaged in this state, they will rapidly succumb to mold growth, clump together into solid blocks, and emit foul odors due to anaerobic decomposition. Therefore, the granules must be immediately transferred to a drying machine to bring their final moisture content down to a stable 10% to 15%. Rotary drum dryers are the industry standard for this task. The granules tumble gently through a large spinning cylinder while warm air is blown across them. It is absolutely critical that the drying temperature remains relatively low (typically under 60°C or 140°F]. Exposing the granules to extreme heat will effectively sterilize them, killing the beneficial earthworm gut bacteria and fungal spores that represent half the value of the
vermicompost. Gentle, consistent drying preserves the biological activity while ensuring a long, stable shelf life in the bag.
Cooling, Screening, and Sizing: Ensuring Uniform Application
After the drying process, the granules are hot and must be cooled before they can be packaged; otherwise, condensation will form inside the bags, leading to spoilage. The hot granules are passed through a rotary cooler, which uses ambient air to rapidly bring their temperature down. Once cooled, the product is passed over a series of vibrating screens to separate the granules by size. This screening process is essential for quality control. The screens separate the material into three categories: oversized lumps, undersized dust (fines], and the perfectly sized marketable granules (usually 2mm-4mm]. The oversized lumps are sent back to the crusher to be broken down into powder, and the undersized fines are routed back into the granulator to act as seed cores for new granules. This closed-loop system ensures zero waste and guarantees that the farmer receives a highly uniform product that will flow flawlessly through precision agricultural equipment without jamming or bridging.
Packaging and Storage: Preserving the Microbial Life
The final step in the manufacturing process is packaging and storage, which must be handled with care to preserve the integrity of the granules. Because these are organic, biologically active products, they cannot be stored in the exact same manner as inert synthetic chemicals. The granules are typically packaged in High-Density Polyethylene (HDPE] woven sacks with an inner waterproof liner. The liner prevents the granules from absorbing ambient humidity from the air, which could cause them to soften and clump. It is also important that the packaging provides some protection against direct UV sunlight, which can degrade the outer layer of the granules. When storing the finished bags, the warehouse should be well-ventilated, dry, and cool. Pallets should be used to keep the bags off the concrete floor, preventing moisture wicking. Under proper storage conditions, high-quality
vermicompost granules can maintain their physical integrity and robust microbial populations for 12 to 18 months, providing a reliable shelf life for distributors and farmers.
Best Practices for Application
Apply these granules evenly across your field during land preparation or as a top dressing for maximum impact.
Conclusion: Reaping the Benefits of Organic Granules
Making your own
vermicompost granules is a highly rewarding practice that ensures sustainable and profitable farming.
Step-by-Step Application Guide
1
Step 1: Select & Compost Raw Materials
Source high-quality cow dung from healthy, naturally-fed cattle. Mix with carbon-rich agricultural biomass (dry leaves, crop residues, straw). Pile into windrows and turn regularly, maintaining moisture at 60-70%, until temperature drops and a dark, crumbly pre-compost forms (4–6 weeks).
2
Step 2: Vermicomposting Phase
Once the pre-compost cools to ambient temperature, introduce epigeic earthworm species (Eisenia fetida or Eudrilus eugeniae) into shallow beds. Manage moisture at 60-70% and maintain temperature. In 45-60 days, worms will convert the compost into nutrient-rich, dark vermicast granule feedstock.
3
Step 3: Harvest & Control Moisture
Harvest when the vermicompost resembles dark coffee grounds with an earthy smell. Separate worms using light exposure techniques or a rotary trommel screen. Dry the harvested castings to 15-25% moisture content using sun drying or a rotary drum dryer to prepare for granulation.
4
Step 4: Granulation
Feed the pre-dried compost into a Disc Pan Granulator, Rotary Drum Granulator, or Flat Die Extrusion Granulator. Spray water or a natural liquid binder (like Guar Gum solution) as the drum/pan rotates, allowing powder to agglomerate into uniform, spherical granules of 2-4mm diameter.
5
Step 5: Dry, Screen & Cool
Pass the freshly formed granules through a rotary drum dryer to reduce moisture to below 15% for storage stability. Next, run through a vibrating screen (trommel) to separate undersized fines and oversized clumps. Allow the granules to cool completely before moving to packaging.
6
Step 6: Package & Store
Pack the finished granules in moisture-proof HDPE woven bags or multi-layer kraft paper bags. Seal tightly and store in a cool, dry, well-ventilated space away from direct sunlight. Properly packaged vermicompost granules maintain microbial activity and nutrient integrity for up to 12 months.
Storage and Shelf Life
Store the granules in a cool, dry place away from direct sunlight to maintain microbial activity for up to 6 months.
📦 Bulk Orders & Export
Mitti Gold Organic: For bulk orders of all organic fertilizers — Farmers, Nurseries, and Export. WhatsApp: +91 95372 30173
Frequently Asked Questions (FAQs]
Can I make vermicompost granules at home without expensive machinery? +
While commercial machinery is required for perfectly spherical, hard granules, small-scale farmers can make crude pellets at home. By mixing
vermicompost with a little clay and water to form a stiff dough, you can push it through a manual meat grinder to create small cylinders, which are then sun-dried. However, these will be less uniform and more fragile than commercial granules.
What is the ideal NPK ratio of vermicompost granules? +
Because it is an organic product, the exact NPK varies based on the raw materials. Generally, high-quality vermicompost granules have an NPK ranging from 1-1-1 to 2-2-2. However, their true value lies not just in NPK, but in the massive amounts of micronutrients, humic acids, and beneficial microbes they deliver, which synthetic fertilizers lack.
How many kilograms of granules are needed per acre? +
Application rates vary wildly depending on the crop and existing soil health. For general broadacre crops like wheat or corn, application rates range from 100 kg to 250 kg per acre. For intensive horticulture and heavy-feeding vegetables, rates can go up to 500 kg per acre. A soil test should always dictate your specific application rates.
Do vermicompost granules expire or go bad? +
They do not \"spoil\" like food, but their biological efficacy diminishes over time. The beneficial microbes will slowly die off if stored for years. When kept in a cool, dry place out of direct sunlight, the granules will maintain their maximum potency for 12 to 18 months.
Can these granules be used in hydroponic or aquaponic systems? +
Standard soil granules are not ideal for hydroponics as they contain binders and organic matter that can clog pumps and cause water fouling. However, \"vermicompost tea\" or liquid extracts made by soaking the granules in aerated water are highly beneficial for these soil-less systems.